How to Make a Picture a Background on PowerPoint
1.Open your PowerPoint presentation.
You can add graphics to the background of any slide in your PowerPoint presentation. Open the presentation you want to edit in PowerPoint.
2.Click the Design tab at the top of the window.
This will display the Design tools.
3.Click the "Format Background" button.
You'll find this on the far right side of the Design ribbon. The Format Background sidebar will appear on the right side of the screen.
4.Select the slides you want to apply the background to.
By default, your background changes will only apply to the active slide.
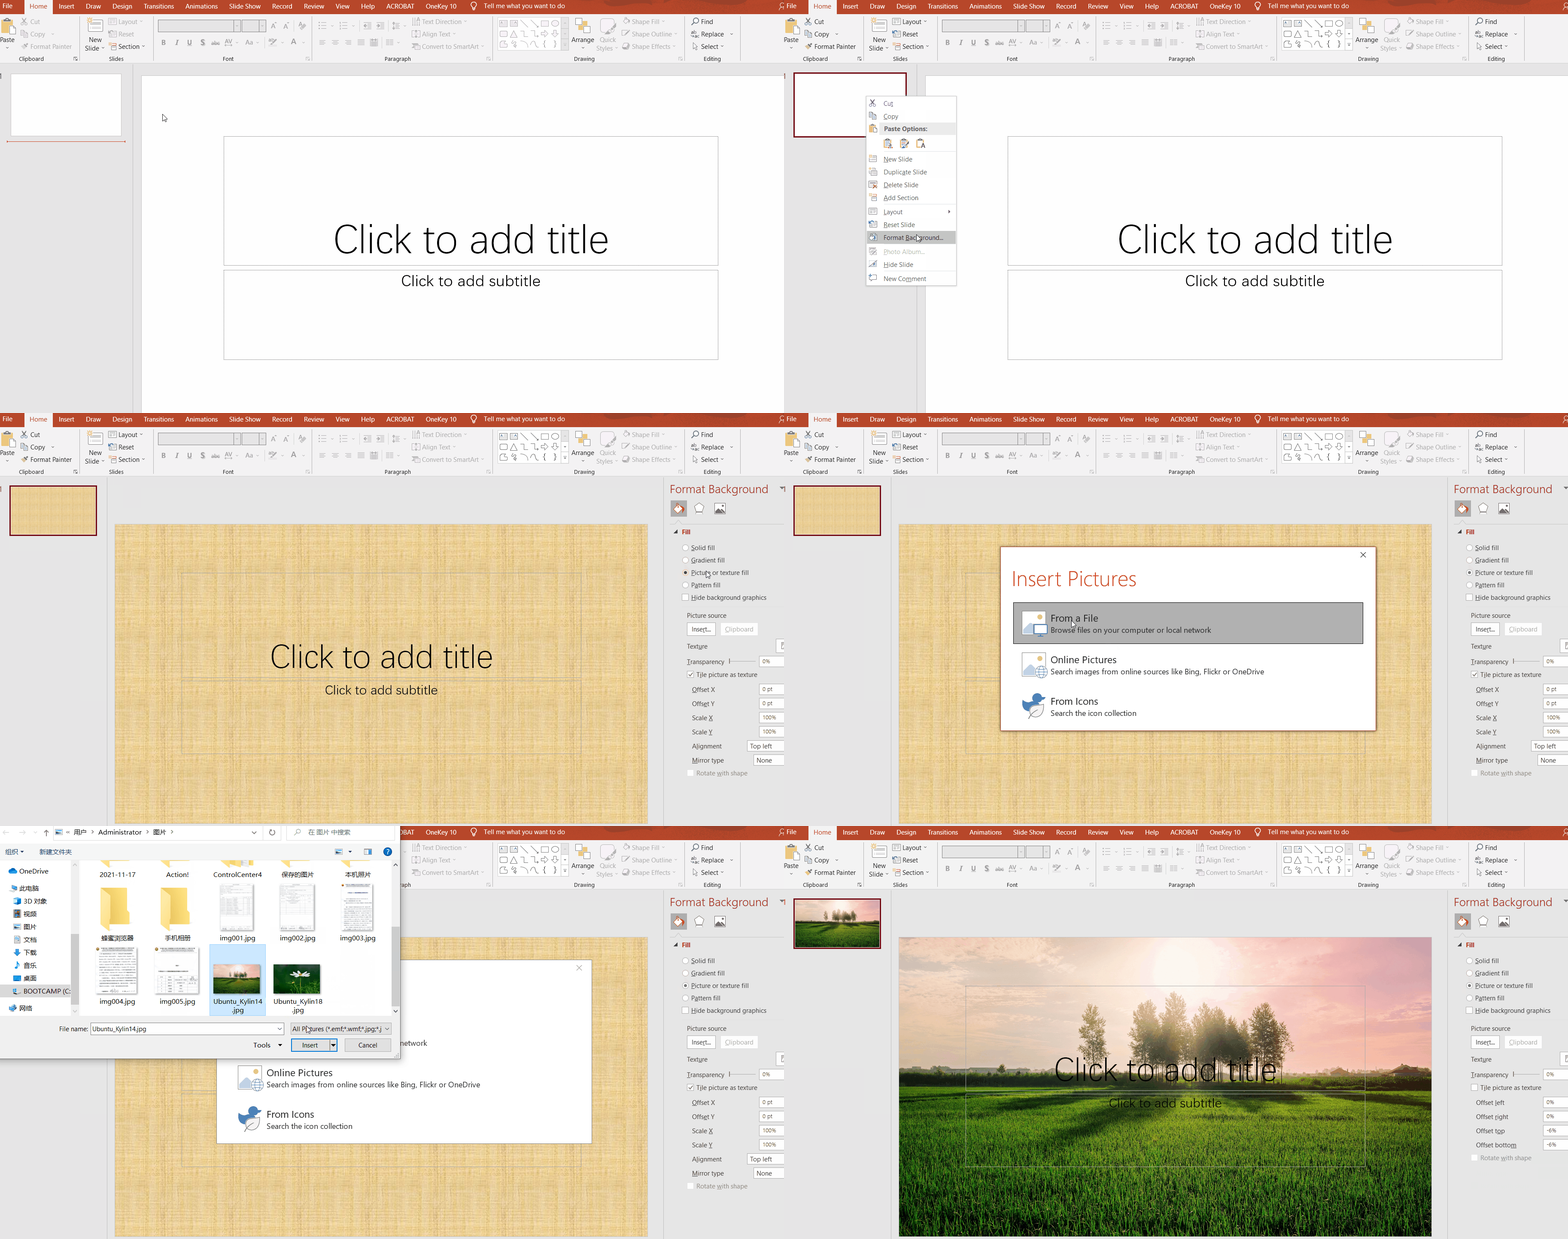
5.Select "Picture or texture fill."
This will allow you to select a picture to use as the background.
There are other fill options you can choose from, such as solid colors, gradients, and patterns. Selecting one will display additional options for that type of fill. This guide focuses on adding images and graphics to the background.
6.Choose the image that you want to insert as the background.
To add an image that will not be stretched or squished, it should be 1280 x 720 pixels in size.
Click the "File" button to select a picture from your computer. A file browser will open, and you can navigate to the image you want to use.
Click the "Online" button to find pictures from online sources. You can perform a Bing web search, choose images stored in your OneDrive, or grab pictures from your Facebook or Flickr account.
Click the "Texture" menu to select from a premade texture background. There are a variety of premade textures that you can pick from if you'd rather not insert your own image.

